I know it's been a while since I've posted anything. I've been busy making some artsy things, experimenting with the folk figures that everyone seems to be doing nowdays. I'll be sure to post pictures soon. I've also got a bunch of new art supplies and some journal items to share. Hopefully I'll be putting together some new videos soon! My real reason in posting this is to spread the word about a little fundraising endeavor I'm trying to put together. This is what I've been posting around. Please consider donating in some fashion or at least spreading the word to everyone you know, it would mean the world to me.
I'm trying to network as much as possible and if any of you can help I really would love you forever. I lost my best friend recently (June 28) to suicide, I am trying to put together an art 'shop' of sorts where all proceeds will be going to www.hopeline.com. They are the founders of 1 800 SUICIDE a suicide prevention hotline that has saved so many people. Anyway, this is the little blurb I have been posting around.
Call to artists/crafters! Donate for a good cause.
I am seeking donations of any and all shapes and sizes. I am in the infant stages of creating a fundraiser to raise money to support the efforts of suicide prevention.
I have already set up a website where all of this is going to take place. The details are up there, but essentially I'm looking for submissions, anything from paintings, prints of original art, ceramics, photography, fiber arts, jewelry anything creative and original. Once submitted it is officially in my possession. I will post the item and your information in the store, and leave things dormant while the amount of merchandise grows. Then I am going to network and advertise like crazy like mentioned above. When and if the item gets purchased all proceeds aside from shipping costs (shipping I will take care of) will be donated to the charity. Once the store opens there will be a period of three months and if your item has not sold by that point I will give you the option to keep the item in the store or I will send it back to you. This is an important cause to me so any help will be great. Spread the word!
If you're interested or have any questions please email me a lindsay.bluto@gmail.com
Please consider donating something small like a print or some sort of trinkety craft, or spread the word to those you know.
Thanks so much
Thursday, August 20, 2009
Sunday, August 09, 2009
New portraits!


I took a nap yesterday after I got my new squishy bed!! And couldn't sleep! It's 7:35 am and I still haven't slept but I made some paintings!
More finishing touches on the portraits from the Goddess and the Poet workshop!
Watercolor Portrait + Masking Fluid

Okay okay okay. I know I posted like 4 posts in a row in one night but what can I say, I have a lot I want to share!
I found the awesome chica that made the tutorial for the cool watercolor portraits using the masking fluid so I am going to linky linky you to that in case you want to try it.
The process is so easy and super fun. Definitely try it out!
FOLLOW ME!
Journal Cover Part Deux!

Okay, so here the the journal cover I decorated the other day. I wish there were more details, feel free to click for full view but I have a feeling its going to be a bit blurry. I wanted to share what I did here, in case it inspires you to try something out yourself along these lines
Materials Used:
-Journal (duh)
-Cardboard
-Scrapbook paper scrap
-Rubber stamps/stamp pad
-Glitter glue
-Acrylic paint
-Gesso
-Glue
-Spackle (ha ha)
1. First what I did was I decided that I wanted there to be some sort of a window, or an indentation. I took the cardboard (it was flat and hard, not like the corregated kind but I dont think it matters) I cut up 4 long strips and 4 small strips, taped them together to make a frame (two pieces thick) I then taped that in the middle of my cover.
2. I took the spackle (I know, random- I saw something like this using modeling paste which makes more sense but I had this stuff laying around after patching a hole in the wall so decided I'd give it a shot) I took the putty knife and liberally smoothed it over the entire cover, I avoided the area where the cover bent to open and shut because if that was too thick it wouldn't open. I didn't want it to look perfect I wanted it to be bumpy and awkward so I just stuck it on there. I let it dry overnight.
3. Next I took a piece of patterned paper and cut it to the size of the window, as sort of a frame backing. I glued it down.
4. I took white gesso and painted the entire thing. The spackle was a bit crumbly so I was hoping to bind it together a bit before adding the acrylic colors.
5. After it dried I painted the cover to my liking, leaving the paper unpainted for the most part.
6. I took some leftover pieces of cardboard and made some simple chipboard hearts. I then painted them black and added some silver glitter glue.
7. I took my letter stamps and wrote love, added the bird stamp and then added some glitter glue to the actual cover itself.
TADAH! Not so hard. You should definitely try working with something like this it's messy but fun and you get some awesome looks out of it. If you have spackle or caulking laying around use that! Don't spring for unnecessary supplies, if you don't then get some modeling paste. It's definitely a great time!
How to decorate a journal cover using masking fluid!
 HOORAY FOR MASKING FLUID!
I had never heard of masking fluid until late last year and it really is quite an interesting little material to use. I thought I'd share a bit about it for you and some things that I have done while incorporating it.
I'm writing this primarily as a response to a video I posted on YouTube. I decided to decorate a cover of a visual journal I have and used masking fluid and decided instead of filling up the little info box over there, I'd direct you here so I could elaborate!)
Masking fluid is a really quite interesting thing, it's a bit difficult to explain I guess. It reminds me of how your fingers are when glue dries to them. How when you peel it off it comes off in a sheet. THAT is the magic of masking fluid. Its a liquid that dries fairly quickly and becomes a rubbery film that essentially masks or protects whatever it covers. It peels extremely easily and comes off in large pieces so it's quick and painless to use.
I'll quickly run through what I did to decorate my journal cover here- nothing crazy but lots of fun!

 (awesome action shot!)
The materials I used:
-Masking fluid
-A yucky paint brush that was pretty much ruined (I have a designated masking fluid/mod podge brush)
-Acrylic paints
-Glitter glue
-Something point (I used a mechanical pencil and a needle) OR an eraser
1. First what I did was apply the masking fluid, I decided I wanted a big old flower in the center so I shook up my masking fluid and painted it on. Now here are a couple things to remember (1. Masking fluid dries really quite quickly and is virtually impossible to get out of a paintbrush. Some say hot water and soap quickly after but I honestly cant imagine that happening unless I stopped every two seconds to wash it out thoroughly so use something you dont mind ruining. 2. You always have to shake the fluid first, and in doing that it ALWAYS creates a billion baby bubbles, I dont know how to avoid that. I just try to ignore them. But something you have to remember is while the fluid is drying the bubbles will pop, when they pop they will leave space uncovered and if you dont go over a few times while drying you'll end up with small dots that color goes through.)
2. Let dry. SERIOUSLY let it dry, if you do a few layers it will take a while, make sure to WAIT IT OUT. I am the most impatient person int he world but if you paint over it and it's still wet everything will smudge and the whole purpose will be defeated.
3.Once you are sure that it is dry (It kind of has a bit of a tacky feel to it though so be aware) paint away! Don't even think about what you're doing just paint however you want.
4. LET DRY. SERIOUSLY LET THAT DRY. C'mon i'm not kidding. Do as I say not as I do. I made it about 2 minutes before I started picking at the wet paint and made some mistakes. It really is best to just walk away, make some tea, watch tv or something and forget it until its completely dry.
5. Once it's dry it's time for the awesome fun part! The peeling! Now when using acrylic paint, sometimes its hard to see where you put your fluid. If you made thicker layers it will be raised but thinner layers sometimes blend in. What I did since I didnt want for the paint to dry was I used something pointy (mechanical pencil/needle- although the pencil lead got onto my cover underneath so I switched halfway through) Take your pointy device and gently pull away at the fluid you can see. It will peel off effortlessly. If you actually wait for the paint to dry, take a white eraser and gently erase over your paint. Make sure not to do it too hard becuase you don't want to life the actual paint, but this method is much easier especially for getting up fluid you cant necessarily see. It will all roll up and you can grab it and pull.
6. I added glitter glue to make it a bit more interesting but the embellishments and details are really up to you!!
What else can you do with masking fluid?
I found this completely awesome awesome awesome tutorial that a girl on craftster.org made for making watercolor portraits (that look so amazingly intricate and difficult) using masking fluid! It's so easy it's ridiculous. I'll try to find the lady and I'll post a quick how to at a later date, but if you follow my youtube at all you'll see an example of what it is.. I took a still frame of it here:

Oh and one more thing. I decorated the cover to one of my smaller visual journals the other day. I started video taping it, but got distracted and didn't end up working on it until late at night. It was a complete experiment but I'll show you the final product and a bit of an explaination in another post. This is getting long and I know some people lose interest after a long post ha ha!
Play! Experiment! Make some kick butt art -PLEASE:D
How to do Image transfers! (Using Mod Podge)
I MADE MY FIRST IMAGE TRANSFER!
(this is in response to a youtube video I posted- check it out)
I had always been so intimidated by the thought of making my own image transfers. For some reason it always seemed so far out of my reach, but alas! It's really quite simple.
I'm calling this a tutorial but it's more some tips on how I did it, and some neat things I found out. There are many, many image transfer ideas out there, more than I would think. I just happened to take a spin of the gel medium transfer. I find that most mixed media artists suggest doing the image transfers with Golden's soft gel medium. I don't have any of that, so I just never tried this out (which you shouldn't do! I have found out with experimentation that you should never not try something based on a lack of supplies, there are always alternatives, especially cheap ones- these are things I plain on sharing soon :) )
After viewing a video on YouTube of Claudine Hellmuth doing a demo of image transference just using some acrylic paint I realized that even though the majority people may do something one way doesn't mean that is the ONLY way. Great thing to remember folks.
Anyway, onto this little tut.
The supplies are simple:
-Mod Podge (used for decoupage and much more inexpensive than Golden's gel medium, although gel medium nontheless I found out)
-A paint brush or sponge to apply Mod Podge
-Your surface to put image on
-Your image (Which must be toner based ie: photocopy, magazine image, picture out of a book etc) **please note that whatever image you are using is going to be in reverse so if you want it to be text you will need to flip the text and then print it out**
-A credit card or something hard to use as a burnishing tool
-Bowl of water
1. Take your image and apply mod podge liberally to the FRONT. Now I've heard several different references to how to gauge this and what I did was spread it like I was lightly buttering toast. Cover the entire image.
2. Place image/mod podge side down where you would like your image to transfer.
3. Take your credit card and firmly drag it across the surface in all directions being sure to apply even pressure. You have to be careful not to rip through the actual paper.
4. Now here is a variable part. I am impatient so I wanted to push the limits. I've heard to leave these for up to 30 minutes to dry- I on the other hand, probably waited about 3 minutes. Pull from the corners up to see if the ink stays on your page being altered. If it has start tearing it up gently. It doesnt need to all come off, I just like to get rid of as much as I can get away with. If you see the page underneath starting to rip or the image starting to distort you may want to leave it a bit longer or stop pulling it up.
5. I take my fingers, but you could take a cloth and get it damp and begin rubbing in circular motions gently. You'll soon see what's left of the image sheet starting to roll up and fall away. This part may take a while for you to get it all up but it really depends on your taste. I happen to like the shabby sort of feel. The imperfection of it looks nice to me. I think if you wanted a more uniform or perfect image you should let it dry longer. I was concerned about the fact that some of the mod podge got onto the back while burnishing and the fact that once the mod podge is dry it is waterproof so I honestly don't know how that will work.
6. Keep working at your image until it is clear of the haze that is left from the image paper pulp and there you have it. A awesome image transfer.
Now keep in mind that there are many ways to go about this, I plan to eventually try them all out. I just wanted to share this one because it is the best for those who have a tight budget (like me) mod podge is a wonderful material I definitely recommend trying this out in some way or another it's surprisingly fun!
I've only made two so far but I plan on doing more so keep your eyes peeled!
 (Self portrait- image printed on plain printer paper, transferred onto a watercolored background)
 (Image from a paperback book- window on a brick building onto watercolored background)
**Please click for larger images**
If you end up seeing this post and trying this out, share what you do- I'm totally interested in seeing
Tuesday, August 04, 2009
Conte Crayons!
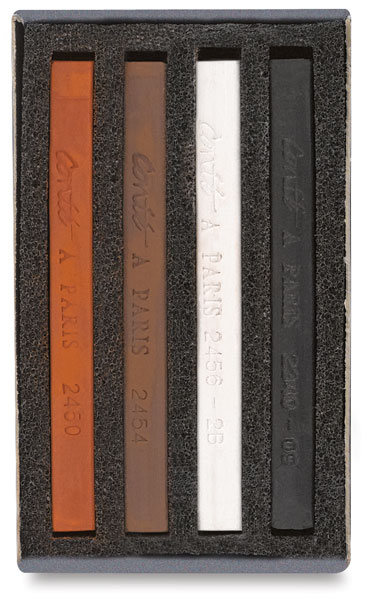
So I've heard about/seen conte crayons before but never really knew what they were. They were on sale online the other day so I got a small package of them and decided to try them out the night before last. The come in a plethora of color choices I guess but I got the traditional package which consists of black, white, brick reddish brown, and chocolate brown.
I ended up drawing a couple portraits, and I really liked how they came out. The sepia tone that is created is really nice I think, and it gives it a very old world feel. Which makes sense considering conte crayons are what the old masters used so a lot of the ancient art is made with that brick/brown tone.
I posted a video of me quickly throwing together a portrait on my youtube. Feel free to check it out, the link is right over there <<<<<------. I really liked using these. They reminded me a lot of chalk pastels which I expected considering these are made from clay and other materials instead of using up the precious graphite back in the day. The plus about them is that they are less chalky even though you can blend them and they will get on your fingers they dont get everywhere if you just lay your hand on them. The downside is similar to that, they don't necessarily blend as easily because they arent as chalky and movable. I found that it was hard to blend the brick and brown together without putting the white over it to smooth out the lines, so I guess you just have to play with it. I think they are definitely worth checking out though at some point or another, I had a good time.


Sunday, August 02, 2009
Portrait Time!
I have always loved drawing portraits, when I was in college I was always praised for my portraits. I tended to use vibrant colors and I'd just sit and draw people during class. Its been years and I had gotten a bit rusty. I decided I wanted to take an online workshop of Suzi Blu's because well, she's awesome and also because I have been putting together an online workshop myself so I've been taking several of them just to get a feel for how they are normally set up.
Anyway, I figured I'd share some of the recent portraits I've done (It's a portrait class btw) So far I've just done the actual face, and the facial shading. Some of them have hair done and some have other clothing or backgrounds finished but most of them are very plain and unfinished. I kind of like them that way. I will get around to doing some backgrounds eventually but as of now i've been just sitting while watching tv and drawing and shading away!
I hope you enjoy!
Friday, July 31, 2009
Hooray for being proactive!
So I have decided that I wanted to start getting my bum in gear and reaching for the stars. I've been artistic and creative my entire life but I have put it on the back burner. I've decided to kick that bad habit and start doing all of the lovely things I love to do and want to continue doing more frequently. I decided to face my fears and start being active in blogging. I've started many but never stuck with them very long. Never found the point because I figure, I'm so small in the giant world of the internet but who cares!
There will hopefully be some reviews, tutorials, videos, inspirational things, I hope to just jam pack this place with some really awesome content. It's my hope that if I keep up with it people will find it and find things they will use.
Until then hello! I'm Lindsay. I hope you'll join me on this great adventure.
I started a YouTube channel with some art journal-process videos, check them out!
www.youtube.com/user/hereintherain
Subscribe to:
Posts (Atom)